Do you want to protect your website’s content from specific users? Or do you want to disable right-click on a specific page or element?
You can use WP Shield Content Protector to filter out protection by different filter types, including filtering by users, pages, even URLs, and much more.
How to Use Activation Filters?
Head to WP Shield → Content Protector, set up the protector you need, and scroll for the Protector Activation Filter section.
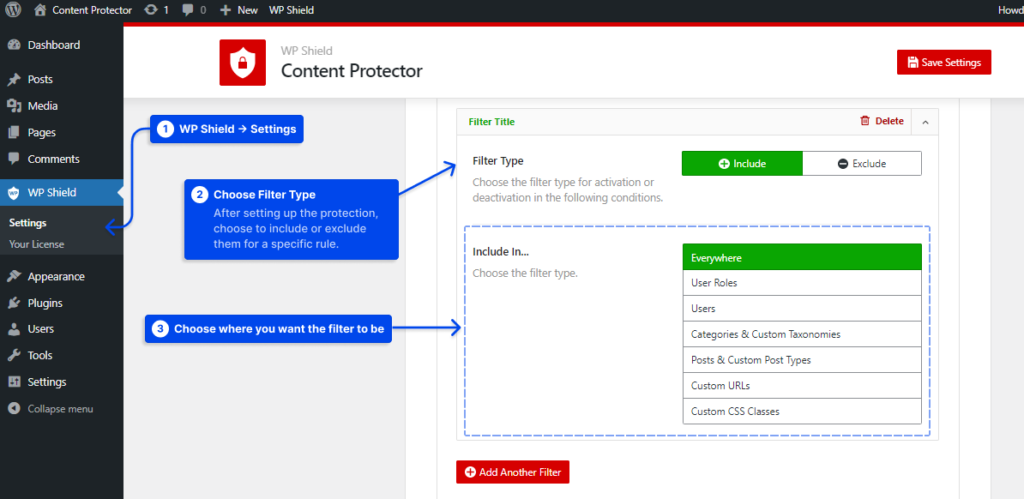
There are two options for filtering protections:
- 🟢 Include: If you choose this filter, you can enable protection for a specific rule.
- 🔴 Exclude: If you select this filter, you can disable the protection for a specific rule.
After choosing the filter, you can select the rule:
- Everywhere: You can use this rule to enable or disable the protection for your whole website.
- User roles: You can disable or enable the protection for a user role like administrator, editor, etc…
- Users: If you want to disable or enable the protection for a specific rule, you can use this option.
- Categories & Custom Taxonomies: You can enable or disable the protection for categories and custom taxonomies in general or for a specific taxonomy.
- Post & Custom Post Types: You can enable or disable the protection for post and custom post types in general or for a specific post type.
- Custom URLs: You can enable or disable the protection on specific URLs.
- Custom CSS Classes: You can enable or disable the protection for a specific CSS class.
How to filter protection by user role?
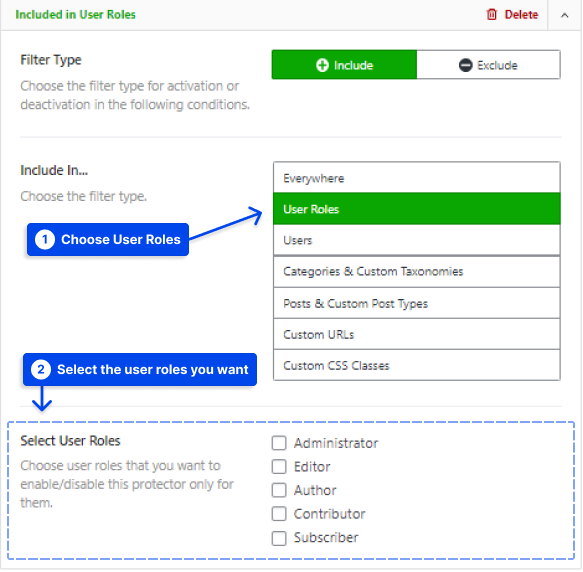
Depending on the user role, you can exclude or include restrictions, such as excluding them for administrators.
Choose User Roles, and a selection of different roles on your website will appear. Now select those user roles you wish to have this filter on.
How to Filter Protection By a Specific User?
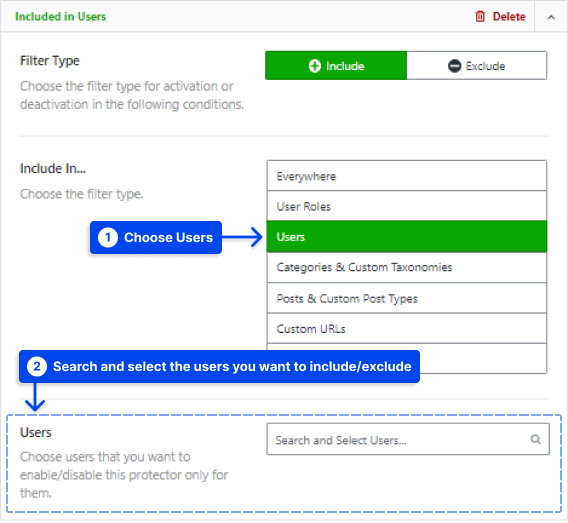
If you want to exclude or include the protection for a specific user, choose Users, and a Users section will show up. Simply search their name or username on this section and select the users you want to have this filter on.
How to Filter Protection by Categories and Custom Taxonomies?
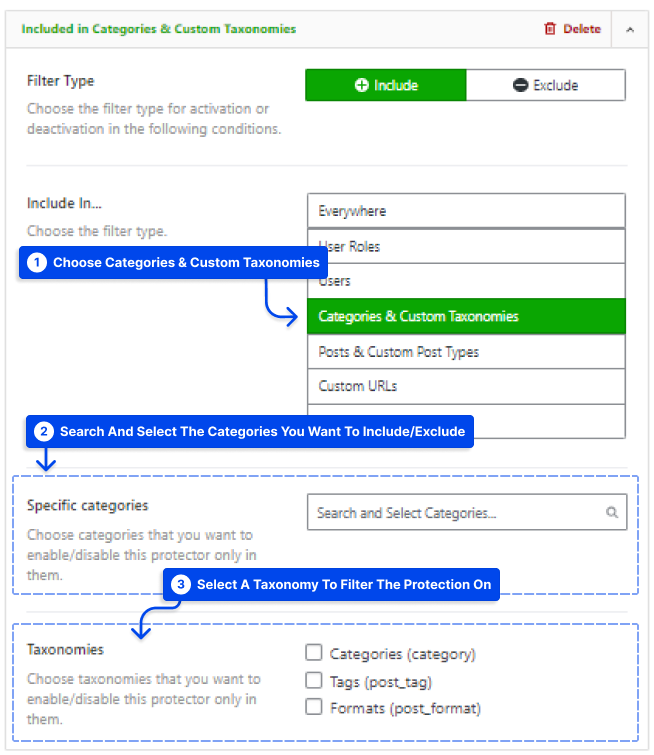
If you want to filter the protection by categories and custom taxonomies by general or a specific taxonomy, choose Categories & Custom Taxonomies.
You have two options to filter the taxonomies:
- Specific categories: The protection can be enabled and disabled for specific categories by selecting them here
- Taxonomies: You can enable/disable the protection for taxonomies in general.
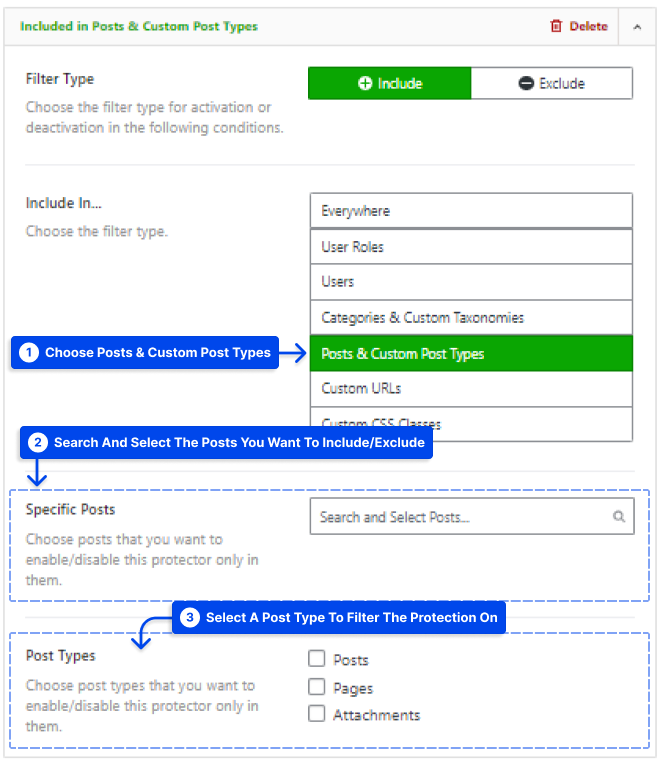
How to Filter Protection by Posts and Custom Post Types?
You can choose custom post types or specific posts to include/exclude the protection on. You have two options when you select Posts & Custom Post Types:
- Specific Posts: The protection can be enabled and disabled for specific posts selected here.
- Post Types: You can enable/disable the protection for post types in general.
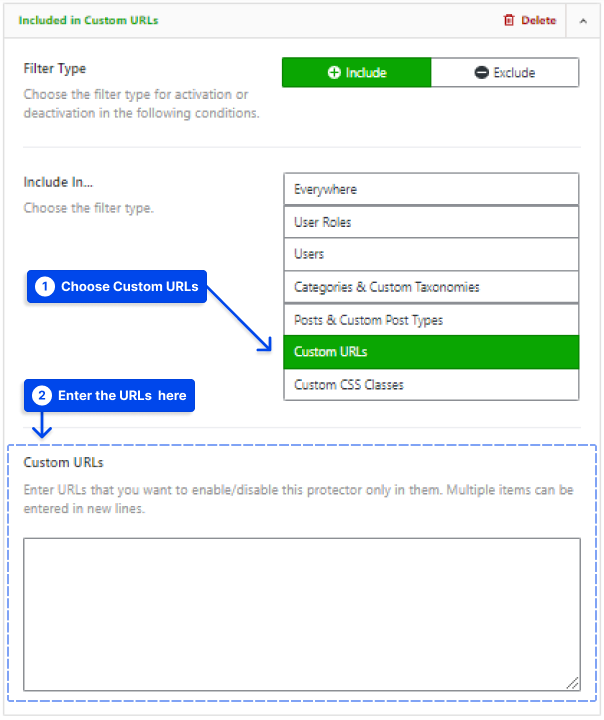
How to Filter Protection by Custom URLs?
You can use this option to include or exclude the protection on a specific page or post. Simply choose Custom URLs and add the URLs in the Custom URLs section.
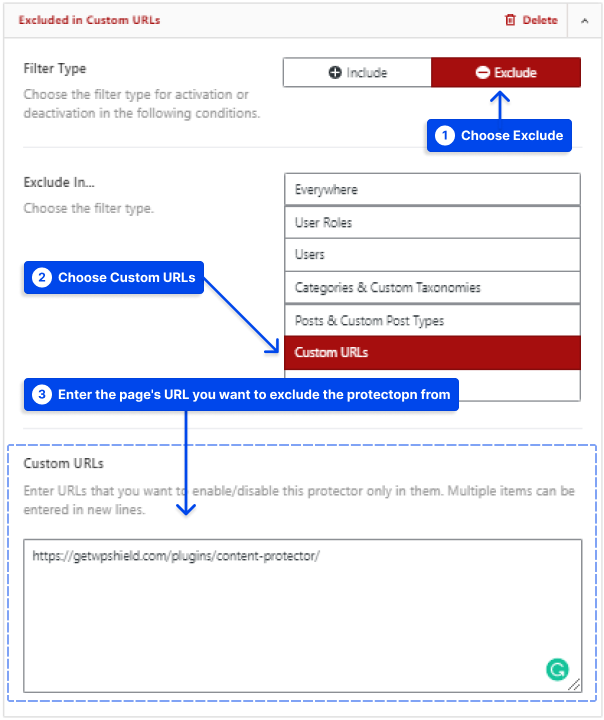
Let's say you want to exclude a page from protection:
- First, you need to choose to Exclude from Filter Type.
- Now select Custom URLs to exclude.
- You need to copy the page's link that you want to exclude the protection from.
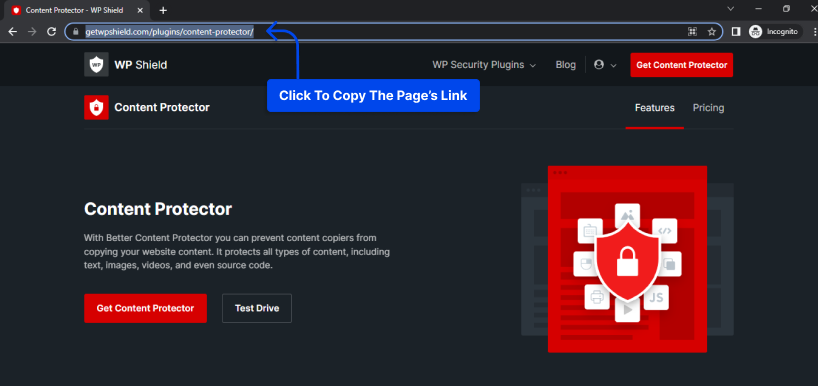
- Paste the link in Custom URLs and save the setting.
Please note that the URL you enter should be contained within your WordPress site. If it is not contained within WordPress, it will not work.
How to Filter Protection by Custom CSS Classes?
You can choose this option if you want to exclude or include protection on a specific element on your website.
Select Custom CSS Classes and add a unique custom CSS class or selector of the element you want in the Custom Elements (CSS Classes) box.
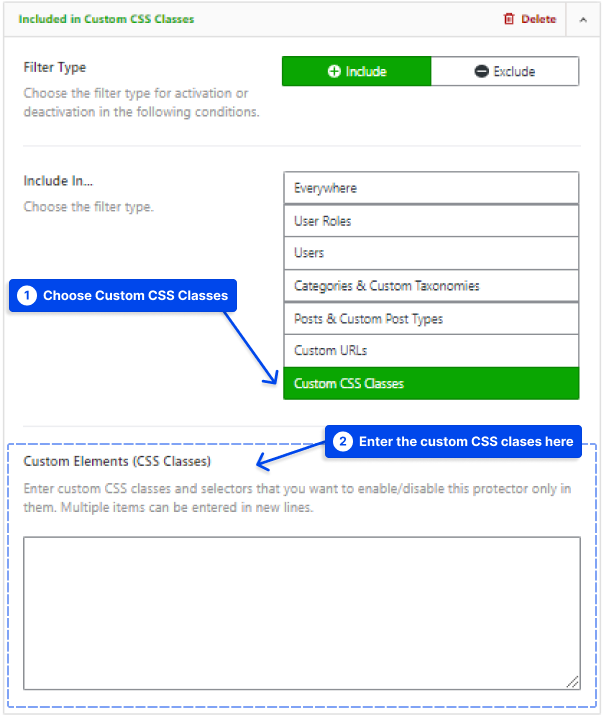
For example, let's say you want to allow the right click on the buttons.
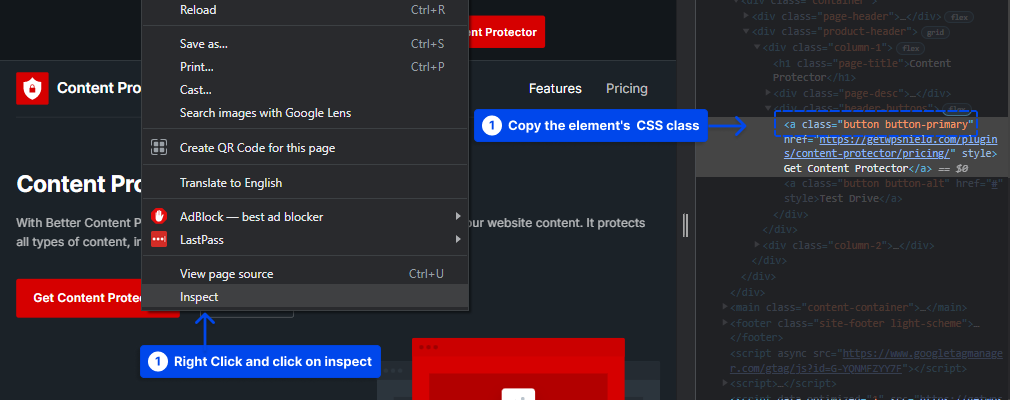
- Go to your website, right-click the button you want, and click on inspect.
- You can find and copy the selected element's class on the opened inspect windows.
- Head to WP Shield, and after setting up the protection, go to Protector Activation Filter and set Filter Type to Exclude
- Choose Custom CSS Classes in the filter
- Add the CSS Class to Custom Elements (CSS Classes)
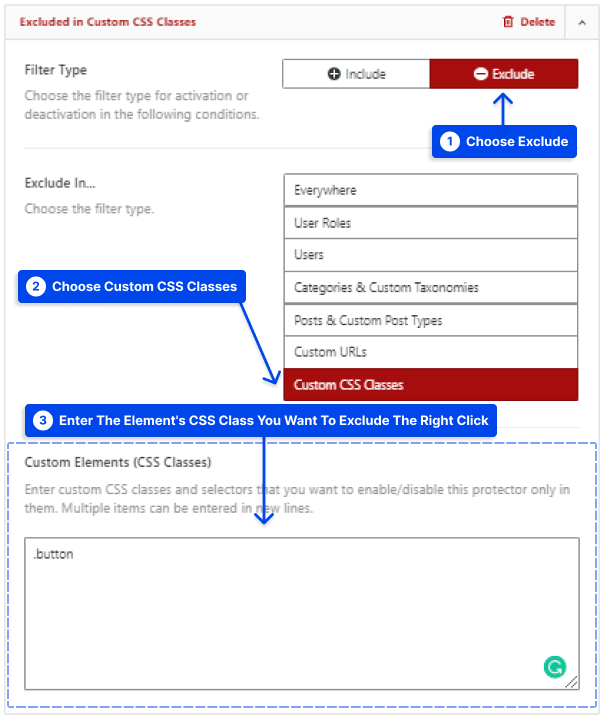
Please note that new CSS classes must be added to the new line of this box.
How to Use Multiple Activation Filters?
If you want more than one filter, click on Add Another Filter and add as many filters as you want.
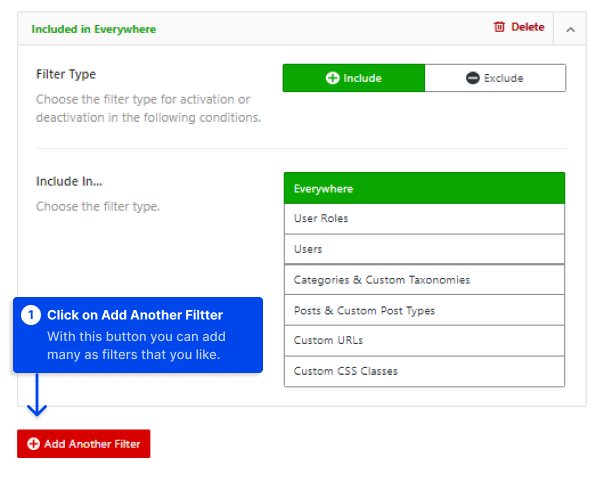
Important Note: If you use multiple filters, they will all be merged together. For example, if you enable a protector everywhere while excluding local users, the protector will be enabled everywhere and disabled for local users (AND).
